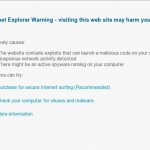
 Antispybox.com is a malicious web site that created to spread a program called Antivir Solution Pro. The program is a malware that classified as rogue antispyware tool because it detects a lot of fake infections and displays various fake security alerts and popups with one purpose to trick you into buying the software.
Antivir Solution Pro is promoted and installed through the use of trojans. Once installed, it will configure your browser (Internet Explorer, Firefox, etc) by changing its proxy settings in such a way that it can redirect you from sites that you want to visit to the antispybox.com. Thus, when you open any site, instead it will display a page, which reported that a visit to this site is dangerous, because it contains malicious exploits that can launch a virus on your computer. This warning is nothing but a fake, so you can safely ignore it.
Obviously, you can not trust neither the antispybox.com website nor its affiliate Antivir Solution Pro. Both created with one purpose, to scare your into purchasing so-called “full” version of the program. Most importantly, do not purchase it! Do not waste your time and money and in any case do not buy anything from this misleading web site! Use the following removal instructions to remove antispybox.com hijacker and its related malware from your computer for free.
Removal instructions for antispybox.com browser hijacker
Step 1.
Run Internet Explorer, Click Tools -> Internet Options as as shown in the screen below.
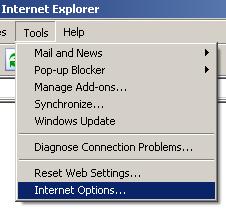
Internet Explorer – Tools menu
You will see window similar to the one below.
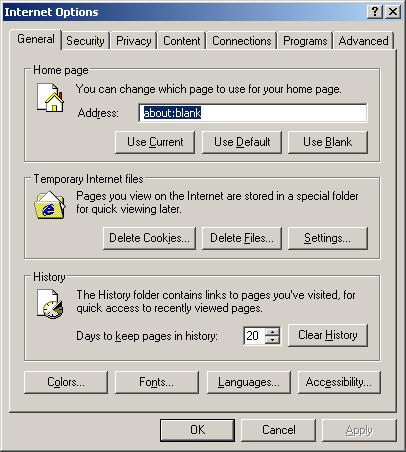
Internet Explorer – Internet options
Select Connections Tab and click to Lan Settings button. You will see an image similar as shown below.

Internet Explorer – Lan settings
Click Advanced button to open Proxy settings. Copy and paste the following text into “Do not use proxy server for addresses beginning with:”
www.myantispyware.com;myantispyware.com;www.malwarebytes.org;go.trendmicro.com;
When you finished, you will see a screen similar below:
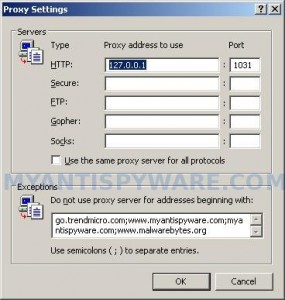
Internet Explorer – Proxy settings
Click OK to save Proxy settings, then Click OK to close Lan Settings and Click OK to close Internet Explorer settings.
Step 2.
Download HijackThis from here. Once Save dialog opens, you need first to rename hijackthis.exe to iexplore.exe. Further click Save button to save it to desktop. If you are using the Firefox, then you need right click to the above link to open a Save dialog. If you still can not download the program, the repeat first step above.
Doubleclick on the iexplore.exe on your desktop for run HijackThis. HijackThis main menu opens.
Click “Do a system scan only” button. Place a checkmark against each of lines that looks like:
R1 – HKCU\Software\Microsoft\Windows\CurrentVersion\Internet Settings,ProxyServer = http=127.0.0.1
O4 – HKLM\..\Run: [abgsckfg] c:\documents and settings\user\local settings\application data\cupilnt\drciln.exe
O4 – HKCU\..\Run: [abgsckfg] c:\documents and settings\user\local settings\application data\cupilnt\drciln.exe
Once finished you will see a screen similar to the one below.
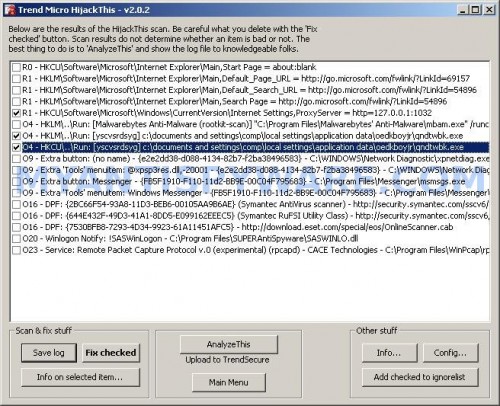
HijackThis
Note: list of infected items may be different. Template of the malicious entry:
Variant 1: [{random string 1}] C:\Documents and Settings\user\Local Settings\Application Data\{random string 2}\{random string 3}.exe;
Variant 2: [{random string 1}] C:\Documents and Settings\user\Local Settings\Application Data\{random string 2}\{random string 3}tssd.exe
Look for examples above. If you unsure, check them in Google.
Please be very careful, do NOT check any other boxes!. Once you have selected all entries, close all running programs then click once on the “Fix checked” button. Close HijackThis.
Run Internet Explorer, Click Tools -> Internet Options. Select Connections Tab and click to Lan Settings button. Uncheck “Use a proxy server” box. Click OK. Click OK.
Step 3.
Download MalwareBytes Anti-malware (MBAM). Close all programs and Windows on your computer.
Double Click mbam-setup.exe to install the application. When the installation begins, keep following the prompts in order to continue with the installation process. Do not make any changes to default settings and when the program has finished installing, make sure a checkmark is placed next to Update Malwarebytes’ Anti-Malware and Launch Malwarebytes’ Anti-Malware, then click Finish.
If an update is found, it will download and install the latest version.
Once the program has loaded you will see window similar to the one below.
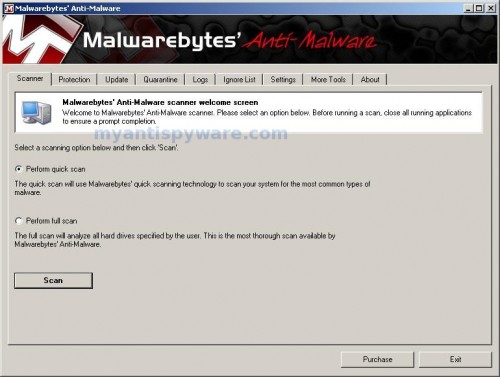
Malwarebytes Anti-Malware Window
Select Perform Quick Scan, then click Scan, it will start scanning your computer. This procedure can take some time, so please be patient.
When the scan is complete, click OK, then Show Results to view the results. You will see a list of infected items similar as shown below. Note: list of infected items may be different than what is shown in the image below.
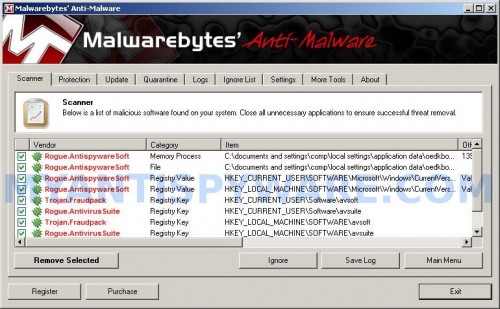
Malwarebytes Anti-malware, list of infected items
Make sure all entries have a checkmark at their far left and click “Remove Selected” button to remove what it found. MalwareBytes Anti-malware will now remove all of associated files and registry keys and add them to the programs’ quarantine. When MalwareBytes Anti-malware has finished removing the infection, a log will open in Notepad and you may be prompted to Restart.
Note 1: if you can not download, install, run or update Malwarebytes Anti-malware, then follow the steps: Malwarebytes won`t install, run or update – How to fix it.
Note 2: if you need help with the instructions, then post your questions in our Spyware Removal forum.
Note 3: your current antispyware and antivirus software let the infection through ? Then you may want to consider purchasing the FULL version of MalwareBytes Anti-malware to protect your computer in the future.


