Are your web-browser’s newtab, search engine and homepage overridden and when you try to open your startpage, you’re automatically re-directed to the Get Driving Directions? Then most probably that you have a hijacker installed on your PC system. It’s a type of potentially unwanted software that is made to change current settings of installed web browsers. To get rid of the hijacker you need to clean your browser from any add-ons you have recently installed on your machine and perform a scan using a trustworthy anti malware or antivirus program.

The “Get Driving Directions” changes web browser home page and search provider
As mentioned above, the Get Driving Directions browser hijacker infection also alters the web-browser’s search engine. So, your internet browser, when searching something, will display a hodgepodge of ads, links to unwanted and ad pages and search results from the big search providers such as Google or Bing. As a result, actual use of a internet browser’s search becomes uncomfortable. Moreover, it can also lead to slowing or even freeze your internet browser.
It’s not a good idea to have an undesired program such as Get Driving Directions hijacker on your system. The reason for this is simple, it doing things you don’t know about. The browser hijacker has the ability to gather lots of personal information about you that may be later sold to third parties. You don’t know if your home address, account names and passwords are safe. And of course you completely don’t know what will happen when you click on any advertisements on the Get Driving Directions web site.
We strongly suggest you to complete the step by step guidance which follow below. We will show you how to get rid of browser hijacker and thus get rid of Get Driving Directions home page from your Microsoft Edge, Internet Explorer, Firefox and Chrome forever.
Remove Get Driving Directions (removal guide)
Even if you have the up-to-date classic antivirus installed, and you have checked your PC system for malware and removed anything found, you need to do the tutorial below. The Get Driving Directions browser hijacker removal is not simple as installing another antivirus. Classic antivirus software are not created to run together and will conflict with each other, or possibly crash MS Windows. Instead we suggest complete the manual steps below after that use Zemana Free, MalwareBytes or AdwCleaner, which are free programs dedicated to detect and remove malware like Get Driving Directions hijacker. Use these tools to ensure the hijacker is removed.
To remove Get Driving Directions, execute the following steps:
- How to manually remove Get Driving Directions
- How to automatically remove Get Driving Directions hijacker infection
- Run AdBlocker to block Get Driving Directions and stay safe online
- Do not know how your browser has been hijacked by Get Driving Directions hijacker?
- To sum up
How to manually remove Get Driving Directions
The useful removal instructions for the Get Driving Directions search. The detailed procedure can be followed by anyone as it really does take you step-by-step. If you follow this process to get rid of Get Driving Directions search let us know how you managed by sending us your comments please.
Remove Get Driving Directions associated software by using MS Windows Control Panel
Some potentially unwanted software, browser hijacking software and adware can be removed by uninstalling the free programs they came with. If this way does not succeed, then looking them up in the list of installed apps in Microsoft Windows Control Panel. Use the “Uninstall” command in order to delete them.
- If you are using Windows 8, 8.1 or 10 then press Windows button, next click Search. Type “Control panel”and press Enter.
- If you are using Windows XP, Vista, 7, then click “Start” button and click “Control Panel”.
- It will show the Windows Control Panel.
- Further, click “Uninstall a program” under Programs category.
- It will show a list of all software installed on the PC system.
- Scroll through the all list, and uninstall dubious and unknown applications. To quickly find the latest installed programs, we recommend sort apps by date.
See more details in the video tutorial below.
Get rid of Get Driving Directions from Google Chrome
Reset Chrome settings is a easy way to delete the hijacker infection, malicious and adware extensions, as well as to restore the browser’s search engine, new tab page and home page that have been modified by hijacker.

- First start the Google Chrome and click Menu button (small button in the form of three dots).
- It will display the Chrome main menu. Choose More Tools, then press Extensions.
- You’ll see the list of installed addons. If the list has the extension labeled with “Installed by enterprise policy” or “Installed by your administrator”, then complete the following guidance: Remove Chrome extensions installed by enterprise policy.
- Now open the Google Chrome menu once again, press the “Settings” menu.
- You will see the Google Chrome’s settings page. Scroll down and click “Advanced” link.
- Scroll down again and click the “Reset” button.
- The Chrome will show the reset profile settings page as shown on the screen above.
- Next click the “Reset” button.
- Once this task is complete, your web browser’s homepage, default search engine and newtab will be restored to their original defaults.
- To learn more, read the blog post How to reset Chrome settings to default.
Delete Get Driving Directions from IE
The Internet Explorer reset is great if your web-browser is hijacked or you have unwanted plugins or toolbars on your web browser, which installed by a malware.
First, launch the IE, then press ‘gear’ icon ![]() . It will display the Tools drop-down menu on the right part of the web browser, then click the “Internet Options” as displayed on the image below.
. It will display the Tools drop-down menu on the right part of the web browser, then click the “Internet Options” as displayed on the image below.

In the “Internet Options” screen, select the “Advanced” tab, then press the “Reset” button. The Internet Explorer will display the “Reset Internet Explorer settings” dialog box. Further, press the “Delete personal settings” check box to select it. Next, press the “Reset” button as shown in the following example.

After the process is finished, click “Close” button. Close the Internet Explorer and reboot your computer for the changes to take effect. This step will help you to restore your web-browser’s search provider by default, new tab page and startpage to default state.
Get rid of Get Driving Directions redirect from Mozilla Firefox
If the FF browser application is hijacked, then resetting its settings can help. The Reset feature is available on all modern version of Firefox. A reset can fix many issues by restoring Mozilla Firefox settings like newtab page, search provider by default and startpage to its default state. It will save your personal information like saved passwords, bookmarks, and open tabs.
First, launch the Mozilla Firefox and click ![]() button. It will display the drop-down menu on the right-part of the browser. Further, click the Help button (
button. It will display the drop-down menu on the right-part of the browser. Further, click the Help button (![]() ) as displayed in the following example.
) as displayed in the following example.

In the Help menu, select the “Troubleshooting Information” option. Another way to open the “Troubleshooting Information” screen – type “about:support” in the browser adress bar and press Enter. It will display the “Troubleshooting Information” page as displayed on the image below. In the upper-right corner of this screen, press the “Refresh Firefox” button.

It will open the confirmation prompt. Further, click the “Refresh Firefox” button. The FF will start a process to fix your problems that caused by the hijacker responsible for redirecting your web browser to Get Driving Directions web-page. Once, it is done, press the “Finish” button.
How to automatically remove Get Driving Directions hijacker infection
In order to completely remove Get Driving Directions, you not only need to remove it from the web browsers, but also remove all its components in your computer including Windows registry entries. We suggest to download and use free removal tools to automatically clean your system of Get Driving Directions browser hijacker infection.
How to remove Get Driving Directions with Zemana Anti-Malware
Zemana Anti Malware (ZAM) is a free program for Windows OS to detect and remove PUPs, adware, harmful web browser extensions, browser toolbars, and other unwanted programs like hijacker that causes internet browsers to open undesired Get Driving Directions web page, installed on your machine.
Click the following link to download the latest version of Zemana Anti-Malware (ZAM) for MS Windows. Save it on your MS Windows desktop or in any other place.
164818 downloads
Author: Zemana Ltd
Category: Security tools
Update: July 16, 2019
When downloading is done, close all apps and windows on your system. Open a directory in which you saved it. Double-click on the icon that’s named Zemana.AntiMalware.Setup as shown in the figure below.
![]()
When the installation starts, you will see the “Setup wizard” which will allow you install Zemana on your machine.
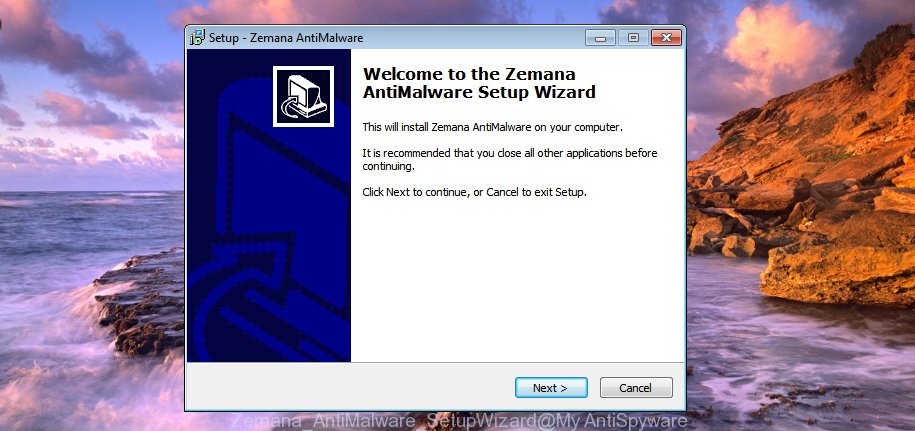
Once installation is done, you will see window as shown below.
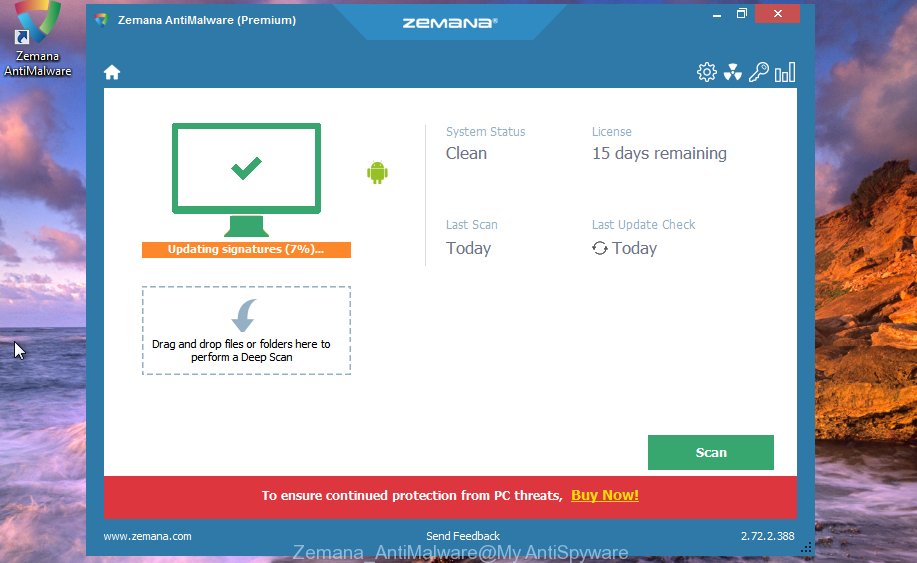
Now click the “Scan” button . Zemana Anti Malware (ZAM) program will scan through the whole computer for the browser hijacker infection responsible for Get Driving Directions redirect. This procedure can take quite a while, so please be patient. While the Zemana Free is checking, you may see how many objects it has identified either as being malware.

As the scanning ends, Zemana Anti Malware will prepare a list of unwanted and ad supported software apps. Make sure all items have ‘checkmark’ and click “Next” button.
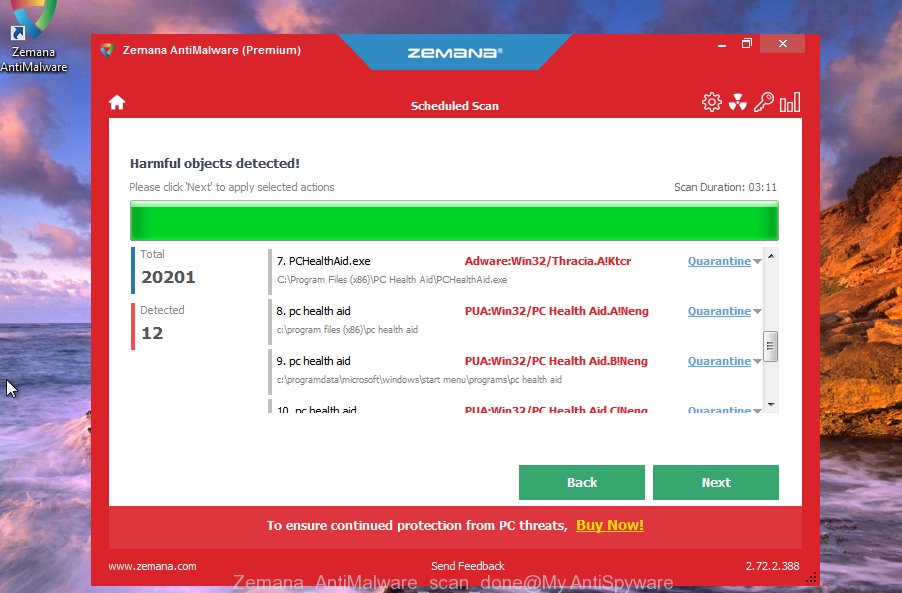
The Zemana Free will remove browser hijacker that developed to redirect your internet browser to the Get Driving Directions page.
How to automatically remove Get Driving Directions with Malwarebytes
Manual Get Driving Directions removal requires some computer skills. Some files and registry entries that created by the browser hijacker can be not completely removed. We recommend that run the Malwarebytes Free that are completely clean your PC system of hijacker infection. Moreover, the free application will allow you to get rid of malicious software, PUPs, ad-supported software and toolbars that your PC system can be infected too.
Download MalwareBytes by clicking on the following link.
327074 downloads
Author: Malwarebytes
Category: Security tools
Update: April 15, 2020
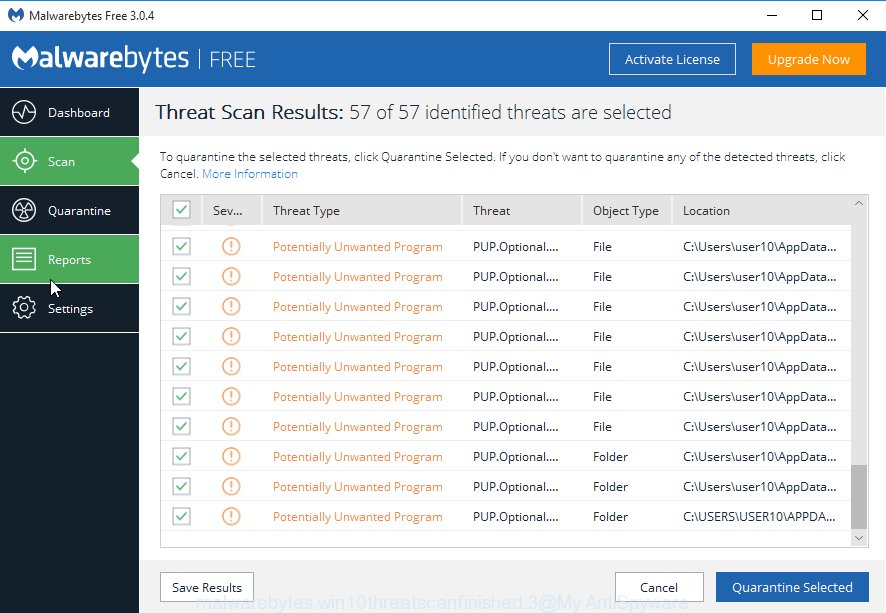
After downloading is finished, run it and follow the prompts. Once installed, the MalwareBytes will try to update itself and when this task is finished, press the “Scan Now” button . MalwareBytes AntiMalware utility will start scanning the whole PC to find out hijacker responsible for redirects to Get Driving Directions. This procedure can take some time, so please be patient. While the MalwareBytes Anti Malware (MBAM) program is checking, you can see number of objects it has identified as threat. Review the scan results and then click “Quarantine Selected” button.
The MalwareBytes is a free program that you can use to remove all detected folders, files, services, registry entries and so on. To learn more about this malware removal tool, we recommend you to read and follow the step by step instructions or the video guide below.
Get rid of Get Driving Directions start page from internet browsers with AdwCleaner
The AdwCleaner utility is free and easy to use. It can scan and get rid of hijacker that cause a redirect to Get Driving Directions web-site, malware, potentially unwanted programs and adware from personal computer (Windows 10, 8, 7, XP) and thereby return internet browsers default settings (newtab page, home page and default search engine). AdwCleaner is powerful enough to detect and remove malicious registry entries and files that are hidden on the PC system.
- Download AdwCleaner from the following link. Save it directly to your Windows Desktop.
AdwCleaner download
225547 downloads
Version: 8.4.1
Author: Xplode, MalwareBytes
Category: Security tools
Update: October 5, 2024
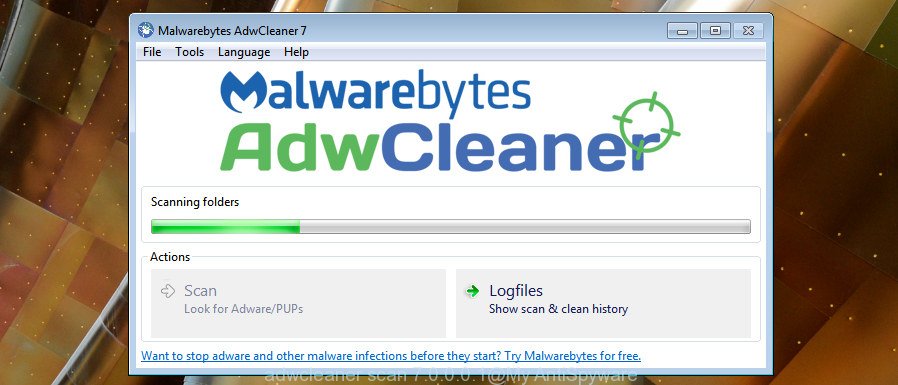
- When the downloading process is complete, double click the AdwCleaner icon. Once this tool is started, click “Scan” button for scanning your computer for the hijacker infection responsible for Get Driving Directions start page. A scan can take anywhere from 10 to 30 minutes, depending on the count of files on your computer and the speed of your PC system. While the tool is checking, you can see number of objects and files has already scanned.
- When the system scan is finished, you may check all items found on your machine. Make sure all items have ‘checkmark’ and click “Clean” button. It will display a prompt, click “OK”.
These few simple steps are shown in detail in the following video guide.
Run AdBlocker to block Get Driving Directions and stay safe online
By installing an ad blocker application such as AdGuard, you’re able to stop Get Driving Directions, autoplaying video ads and delete a large amount of distracting and unwanted ads on web-pages.
Installing the AdGuard is simple. First you’ll need to download AdGuard on your personal computer by clicking on the link below.
26846 downloads
Version: 6.4
Author: © Adguard
Category: Security tools
Update: November 15, 2018
When the download is complete, double-click the downloaded file to run it. The “Setup Wizard” window will show up on the computer screen as shown in the figure below.
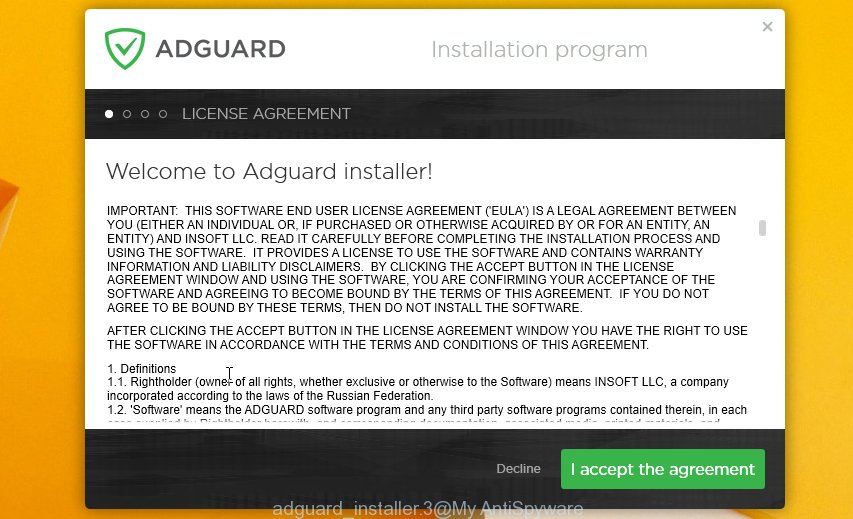
Follow the prompts. AdGuard will then be installed and an icon will be placed on your desktop. A window will show up asking you to confirm that you want to see a quick guide as displayed in the figure below.

Click “Skip” button to close the window and use the default settings, or press “Get Started” to see an quick tutorial which will allow you get to know AdGuard better.
Each time, when you start your PC system, AdGuard will start automatically and stop ads, Get Driving Directions redirect, as well as other harmful or misleading web pages. For an overview of all the features of the program, or to change its settings you can simply double-click on the AdGuard icon, that is located on your desktop.
Do not know how your browser has been hijacked by Get Driving Directions hijacker?
In most cases, the Get Driving Directions hijacker is bundled within the installation packages from a free hosting and file sharing web sites. So, install a freeware is a a good chance that you will find a bundled browser hijacker infection. If you don’t know how to avoid it, then use a simple trick. During the setup, choose the Custom or Advanced installation method. Next, click ‘Decline’ button and clear all checkboxes on offers that ask you to install additional software. Moreover, please carefully read Term of use and User agreement before installing any software or otherwise you may end up with another unwanted program on your machine such as this hijacker.
To sum up
Once you have finished the few simple steps shown above, your computer should be free from hijacker that causes internet browsers to display intrusive Get Driving Directions site and other malicious software. The Chrome, Edge, FF and Microsoft Internet Explorer will no longer open annoying Get Driving Directions web-page on startup. Unfortunately, if the step by step guidance does not help you, then you have caught a new hijacker infection, and then the best way – ask for help in our Spyware/Malware removal forum.

