XTBL is a virus from a family of file-encrypting Troldesh/Shade ransomware. Once started, it will encrypt all personal files stored on a computer drives and attached network drives.
It uses very strong hybrid encryption with a large key. When XTBL virus encrypts a file, it will add the .xtbl extension to each encrypted file. Once the virus finished enciphering of all files, it will create a file named “How to decrypt your files” with the following contents:
DECRYPT FILES EMAIL Vegclass@aol.com or Greebin@india.com
XTBL offers to make a payment 5Bitcoin that near $2000 to get a key to decrypt files. Important to know, currently not possible to decrypt the .xtbl files encrypted by the ransomware without the the private key and decrypt program.
If you choose to pay the ransom, there is no 100% guarantee that you can get back your files! If you do not want to pay for a decryption key, then you have a chance to restore your files. Use the step-by-step guide below to remove the virus itself and try to restore your files.
How does a computer get infected with XTBL virus
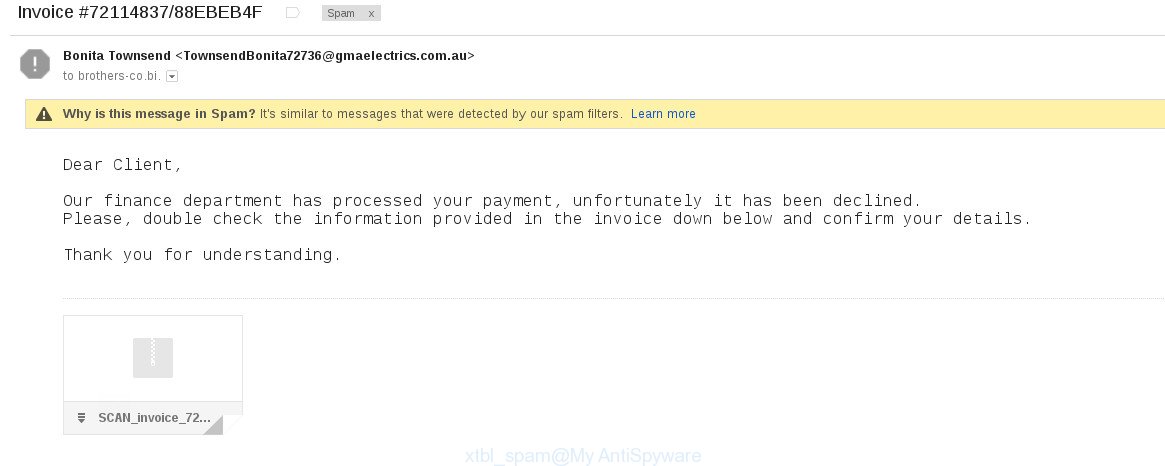
XTBL virus is distributed through the use of spam emails. Below is an email that is infected with a virus like XTBL.
Once this attachment has been opened, this virus will be started automatically as you do not even notice that. XTBL will start the encryption process. When this process is done, it will display the usual ransom instructions like above on how to decrypt your files.
How to decrypt .xtbl files encrypted by XTBL virus
Currently there is no available method to decrypt .xtbl files. Virus-cipher repeatedly tells the victim that uses a strong encryption algorithm with 2048-bit key. What does it mean to decrypt the files is impossible without the private key. Use a “brute forcing” method is also not a way because of the big length of the key. Therefore, unfortunately, the only payment to the authors of the XTBL entire amount requested – the only way to try to get the decryption key.
There is absolutely no guarantee that after the payment of the authors of the XTBL Locker will provide the necessary key to decrypt your files. In addition, you must understand that paying money to these cyber criminals, you are encouraging them to create a new virus.
Step-by-step instructions on How to remove XTBL virus and restore .xtbl files
The following instructions is a full step-by-step guide, which will help you to remove XTBL malicious software and try to restore all encrypted files. Important to understand that we cannot guarantee that you will be able to recover all encrypted documents, photos and other files. Please do the instructions step by step. If you need a help or have any questions, then ask for our assistance here or type a comment below.
1. Remove XTBL virus with MalwareBytes Anti-malware.
2. Remove XTBL virus with Kaspersky virus removal tool.
3. Restore .xtbl files with ShadowExplorer.
4. Restore .xtbl files with PhotoRec.
1. Remove XTBL virus with MalwareBytes Anti-malware.
Download MalwareBytes Anti-malware (MBAM) from the link below.
MalwareBytes Anti-malware download link
Once downloaded, close all programs and windows on your computer. Open a directory in which you saved it. Double-click on the icon that named mbam-setup like below.

When the installation begins, you will see the Setup – Wizard that will help you install MalwareBytes Anti-malware on your computer.

Once installation is complete, you will see window similar to the one below.
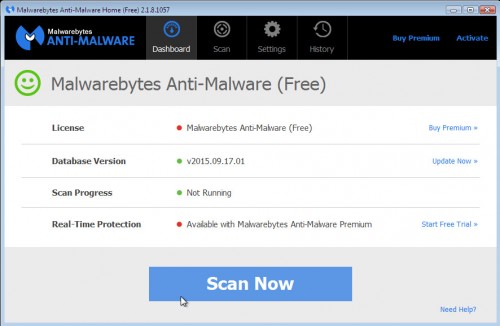
Now click on the Scan Now button to start scanning your computer. This procedure can take some time, so please be patient.

When the scan is finished, make sure all entries have “checkmark” and click Remove Selected button. MalwareBytes Anti-malware will start to remove ransoware related files, folders, registry keys. Once disinfection is completed, you may be prompted to Restart.
2. Remove XTBL virus with Kaspersky virus removal tool.
Download Kaspersky virus removal tool from here and save it directly to your Windows Desktop.
Double-click on the KVRT icon found on your desktop. Once initialization process is finished, you will see the Kaspersky virus removal tool screen as shown below.
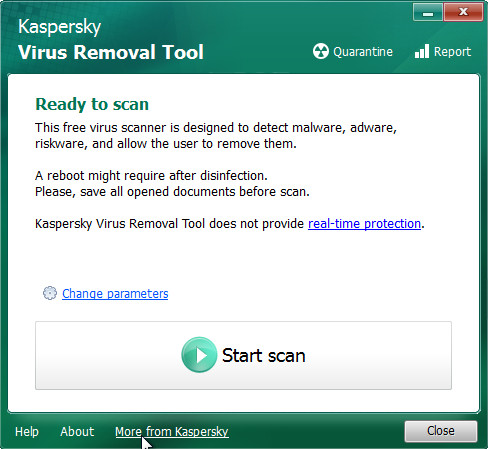
Click Change Parameters and set a check near all your drives. Click OK to close the Parameters window. Next click Start scan button. Kaspersky virus removal tool will now start scanning your computer for known infections. This procedure can take some time, so please be patient.
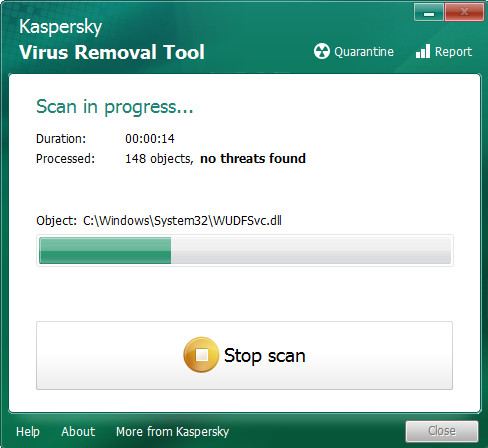
When KVRT has finished scanning, you will see a screen like shown below.
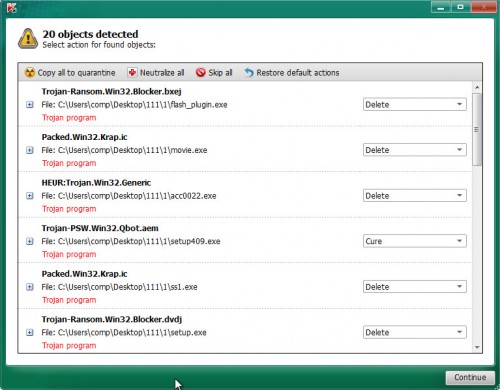
Click on Continue to start a cleaning process.
3. Restore .xtbl files with ShadowExplorer.
Download ShadowExplorer from the following link.
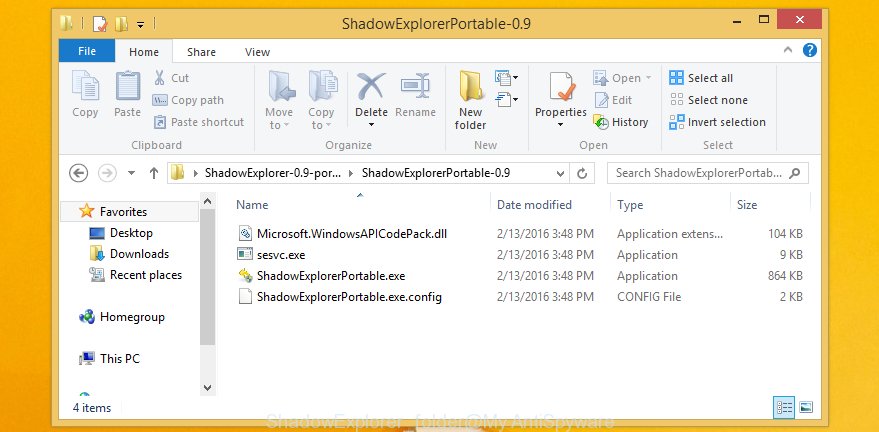
Open a directory in which you saved it. Right click to ShadowExplorer-0.9-portable and select Extract all. Follow the prompts. Next please open the ShadowExplorerPortable folder as shown below.
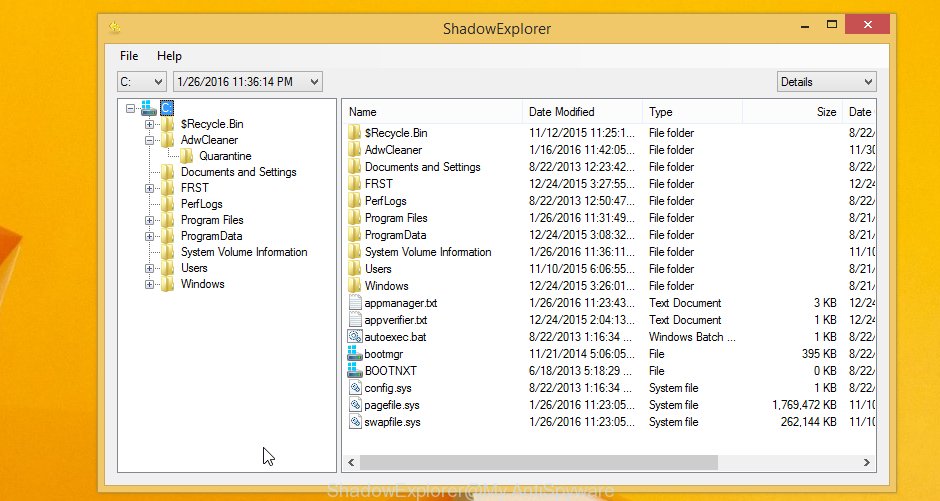
Double click ShadowExplorerPortable to run it. You will see the following screen.
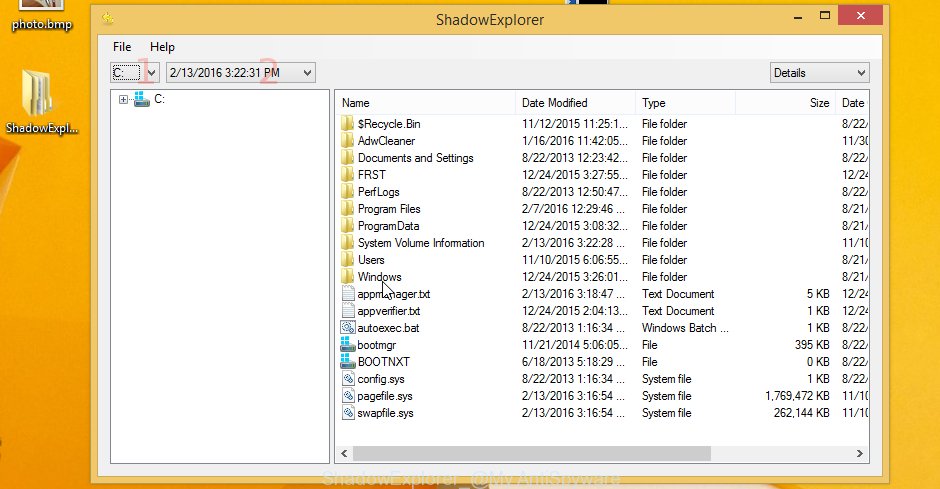
In top left corner, select a Drive and a latest restore point as shown on the example below (1 – drive, 2 – restore point).
On right panel look for a file that you want to restore, right click to it and select Export. An example below.
4. Restore .xtbl files with PhotoRec.
Download PhotoRec from the link below.
Open a directory in which you saved it. Right click to testdisk-7.0.win and select Extract all. Follow the prompts. Next please open the testdisk-7.0 folder as shown below.
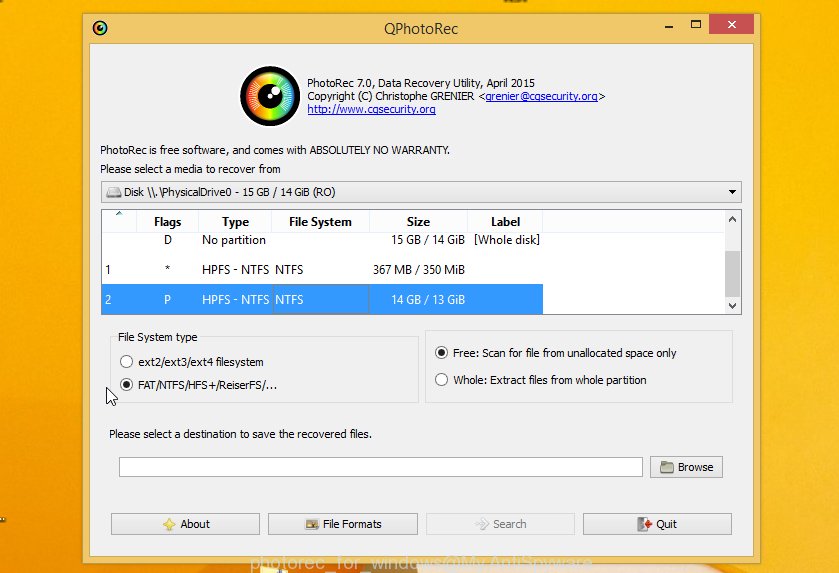
Double click on qphotorec_win to run PhotoRec for Windows. It will open a screen like below.
Select a drive to recover from as shown below.
You will see a list of available partitions. Select a partition that holds the lost and encrypted files. An example below.
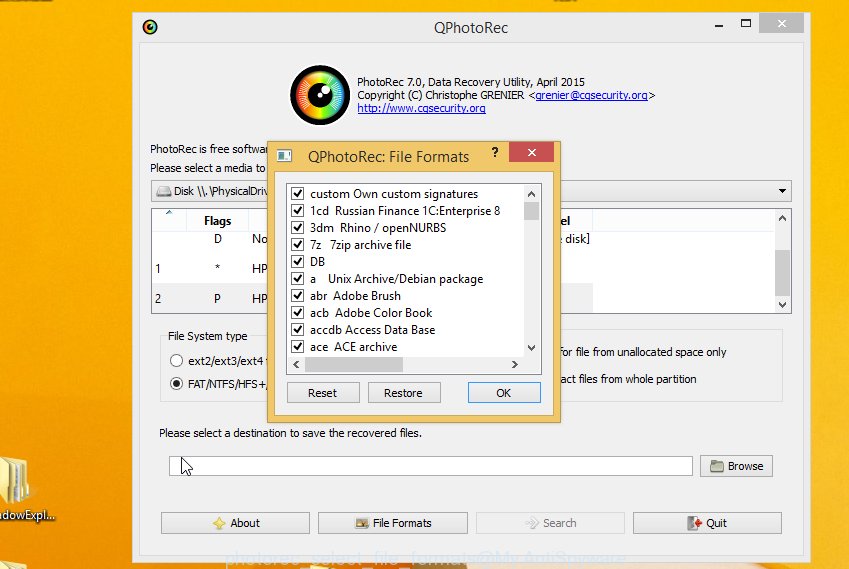
Click on File Formats button and select file types to recover. You can to enable or disable the recovery of certain file types. When this is done, click OK button.
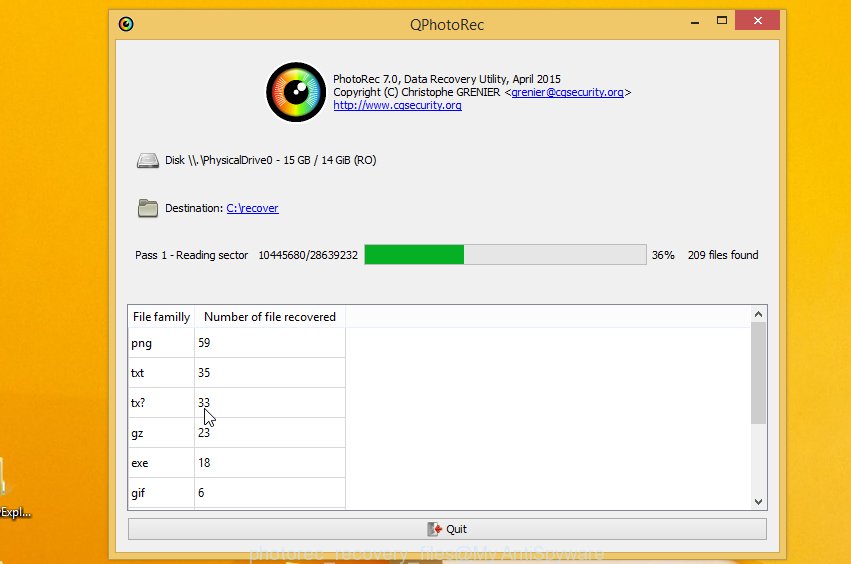
Next, click Browse button to select where recovered files should be written, then click Search.
Count of recovered files is updated in real time. All recovered files are written in a folder that you have selected on the previous step. You can to access the files even if the recovery process is not finished.
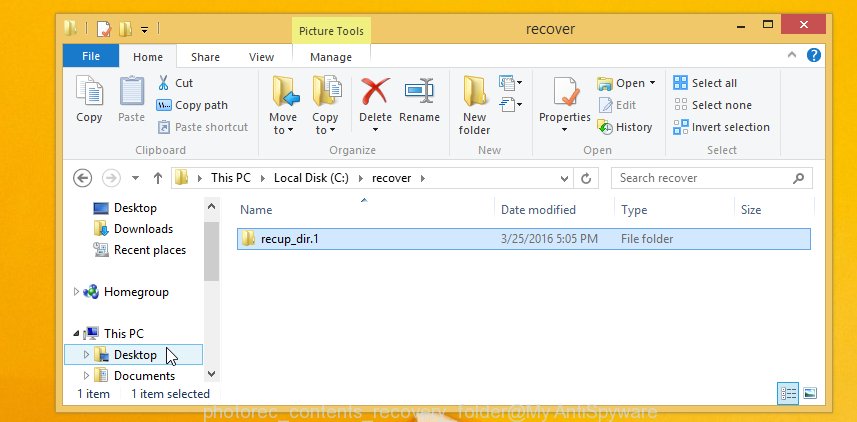
When the recovery is completed, click on Quit button. Next, open the directory where recovery files are stored. You will see a contents like below.
All recovered files are written in recup_dir.1, recup_dir.2 … sub-directories. If you are looking for a specific file, then you can to sort your recovered files by extension and/or date/time.
The End.
Your computer should now be free of the XTBL virus infection. If you need help with the instructions, then ask for help here.







Batman_good@aol.com;

f_tactics@aol.com

diablo_diablo2@aol.com

legioner_seven@aol.com

donald_dak@aol.com

seven_legion@aol.com

last_centurion@aol.com
E-mail addresses These they are the same .
team are a liar in our country has been a lot of people fall into the trap after the paying ransom they are missing,.
Remember, do not pay any fees.